



How to Repair RV Blinds by Restringing and Fixing Common Problems
Most RV blinds can be repaired by correcting cord tension, replacing worn guides, or restringing the shade with cord that matches the original diameter. Identify the shade type before removing a screw. Pleated shades use cords, rails, anchors, and often a spring. Roller shades use a tube and spring or motor. A fix meant for one system can damage the other.
How to Repair RV Blinds After a Quick Diagnosis
A free cord near the wall usually slips from its retainer. Operate the shade once while supporting the bottom rail with both hands. Watch where it tilts, catches, or stops. A shade that drops evenly often needs more tension. One that rises crooked may have uneven tension or a worn guide.
Match the Symptom to the First Safe Check
|
Symptom |
Likely cause |
First check |
Usual decision |
|
Shade drops after release |
Low cord tension |
Tighten both retainers equally in small amounts |
Adjust |
|
One side hangs lower |
Uneven tension or broken cord |
Compare both cord paths and anchor positions |
Adjust or restring |
|
Cord has fuzzy fibers |
Guide friction or age |
Inspect every guide and end cap |
Replace cord and worn guide |
|
Shade is hard to move |
Excess tension or pinched cord |
Ease both retainers and check the rails |
Adjust |
|
Fabric will not roll straight |
Tube or bracket alignment |
Stop operation and check level |
Realign or service |
|
Pleats are brittle or torn |
Heat and age damage |
Check the full fabric panel |
Replace |
Confirm That the Blind Can Be Restrung
Look for a label under the headrail. Photograph it, then take clear pictures of both side paths and the anchor positions. Cord routing can change with the shade width and operating system.
Check the rail material and look for removable end caps. A repairable pleated shade usually allows access to its cord path without cutting the fabric or opening a sealed mechanism.

How to Restring RV Blinds Without Losing the Cord Path
Restringing works when the pleated fabric and rails remain sound. The cord crosses inside the rails to balance the shade, so every original crossover and exit point must be recorded before disassembly.
Gather the Right Cord and Basic Tools
Match the diameter at an unworn section of the old cord with a caliper. Do not measure a frayed end because separated fibers can make the cord appear thicker than it is.
Use a flat screwdriver, the correct driver bit, scissors, painter's tape, and a thin wire or large needle. Keep small caps and screws in separate labeled containers.
Record the Route Before Removing Old Cord
Lower the shade partway and support the bottom rail. Release the wall retainers before unclipping the headrail. Lay the shade flat with its room-facing side marked. Photograph the top rail, center rail, bottom rail, and both cord exits.
Remove the end caps gently, then slide each rail only far enough to expose the cord. Draw the route on paper with the left and right sides clearly marked.
Replace the Cord One Section at a Time
-
Compress the pleats and secure them loosely so the holes line up.
-
Remove one old cord while leaving another route visible when the design permits.
-
Lay the old cord flat and cut the replacement slightly longer. The extra length is needed for the spring connection and final tension setting.
-
Attach the new cord to the spring with the same knot and connection points shown in your photograph.
-
Feed a thin wire through the stacked pleat holes. Join it to the cord with a narrow tape wrap, then pull slowly.
-
Cross the cord inside the center rail exactly where the original crossed. Continue through the lower pleats without twisting the fabric.
-
Route the cord across the bottom rail to the correct exit. Confirm the path against your photograph before closing the rail.
-
Refit the rails and end caps while keeping the cord away from every sliding edge.
Stop if the cord must be forced through a hole. Check for a crushed pleat, rough guide, or incorrect cord diameter before continuing.
Set Tension and Test the Repaired RV Blind
Center the spring before mounting the shade. The cords exiting the bottom should have matching usable lengths. Reinstall the headrail, then attach both retainers at their recorded positions.
Increase tension in small, equal changes until the shade holds at half height. Reduce it if moving the rail requires noticeable force.
Raise and lower the shade several times while holding the rail near both ends. It should remain level and stop wherever released.
Inspect the cord exits after testing. Fresh fuzz on the replacement cord means a guide, bushing, or end cap still has a rough surface.
How to Fix Common RV Blind Problems Without Restringing
Not every fault requires new cord. Check visible tension parts and mounting alignment first because these repairs preserve the original routing and require less disassembly.
Fix a Shade That Will Not Stay Up
Check both wall retainers before taking the shade down. Tighten each side by the same small amount, then test at half height. Stop tightening when the shade holds its position and still moves without strong force.
Fix a Crooked or Catching Shade
Level the bottom rail by easing the tight side or adding slight tension to the loose side. If the tilt returns at the same height, remove the shade and inspect that section of cord.
Check the mounting brackets with a level. One bracket sitting higher can make a correctly strung shade appear uneven.
When to Replace Instead of Repair RV Blinds
Replace an RV blind when damage affects the fabric, rail, operating system, or safe mounting. The replacement must fit the RV window, clear nearby hardware, and remain secure during travel. If you decide to buy a new one, measure the opening at the top, middle, and bottom. Record the narrowest width for an inside mount, then confirm the product's deduction rules.

Replace When the Fabric or Rail Is Structurally Damaged
Restringing will not repair fabric that tears around several cord holes. Brittle pleats can split again soon after new cord is installed.
A bent headrail also makes replacement more practical. It can pinch the cord, tilt the bottom rail, or prevent the shade from moving through its full range.
Replace the blind if the fabric is separating from the rail or the mounting brackets no longer hold firmly. These failures affect the complete assembly rather than one replaceable part.
Replace When Cord Failures Keep Returning
A second cord failure soon after restringing can indicate worn guides, rough exit holes, or a distorted rail. Replacing the cord again may only delay the same problem. Repeated failures also increase the time spent removing the RV valance and headrail.
If several blinds have the same worn design, replacing them may provide more dependable operation. Cordless motorized roller shades remove the manual lift cord that caused the repeated repair, making them a good choice.
Replace When an RV Sleeping Area No Longer Has Privacy or Darkness
A damaged shade beside an RV bed should be replaced when torn fabric, faded material, or distorted pleats allow unwanted light and outside visibility. A new cord can restore movement, but it cannot restore the fabric.
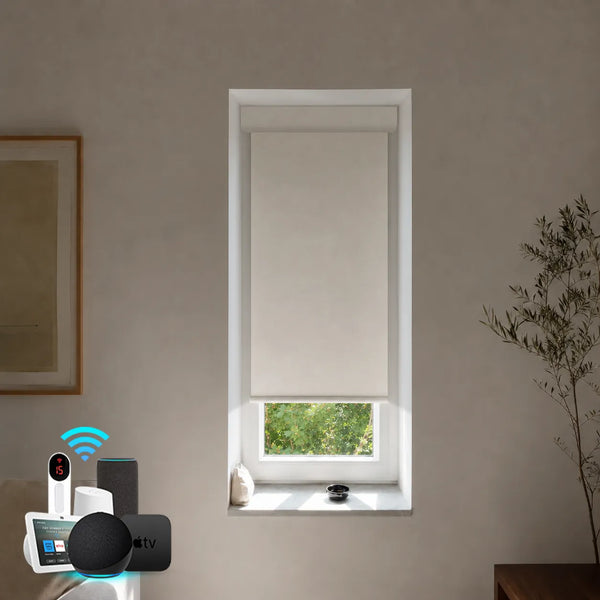
For a window within the listed width range, the Bringnox Small Window Motorized Roller Shades 100% Blackout replaces the failed corded shade with cordless motorized movement. Its blackout fabric addresses privacy and room darkening together.
Replace When the Existing Blind Creates a Safety or Access Problem
Loose operating cords, broken retainers, and exposed internal parts can make an old RV blind unsuitable for continued use. Replacement is the safer choice when compatible repair parts cannot be identified. Motorized shades may also help when cabinetry or fixed furniture makes the window difficult to reach.
FAQs
Can I Restring RV Blinds Without Removing Them?
Usually, no. Pleated shades need a flat work surface so the rails, spring, and cord route stay controlled. Removal also exposes hidden guides that may be damaging the cord.
What Cord Should I Use for RV Blinds?
Match the original diameter. Measure an unworn section and check the parts information for the exact shade. Cord that is too thick can bind, while thin cord may wear quickly.
Why Do My RV Blinds Keep Falling?
They usually lack cord tension. Tighten both retainers equally and test again. A broken cord, loose anchor, or stretched spring needs repair if adjustment has no effect.
How Tight Should RV Blind Strings Be?
Only tight enough to hold position. The shade should remain at half height and move without strong force. Small equal adjustments help keep the bottom rail level.
Final Takeaway
Start with tension and worn guides, then restring only after recording the original path. Match the cord diameter, preserve every crossover, and test with small tension changes. Replace the shade when damaged fabric or structural parts can no longer support a safe repair.