



How to Install Zebra Blinds: A Step-by-Step Guide
Most zebra blinds can be installed with brackets, screws, a level, and basic household tools. The correct process depends on whether you ordered an inside mount, outside mount, or purpose-built no-drill system. Read the instructions supplied with your blind before starting because bracket spacing and locking methods vary by model. Confirm that the mounting surface can support the cassette, and get qualified help if the hardware or drilling location is uncertain.
What You Need Before Installing Zebra Blinds
Preparing the tools and hardware before installation makes each step easier to follow.
|
Tool or Material |
Used For |
|
Steel tape measure |
Checking size, spacing, and position |
|
Pencil |
Marking bracket and screw-hole locations |
|
Level |
Keeping brackets and the cassette straight |
|
Drill and suitable bit |
Making pilot holes in the mounting surface |
|
Screwdriver |
Tightening the bracket screws |
|
Stable step stool |
Reaching the window top safely |
|
Supplied brackets and screws |
Attaching the blind correctly |
|
Suitable wall anchors |
Securing brackets to the mounting surface |
|
Stud finder, when applicable |
Locating framing before drilling |
Check the Package Contents
Lay out the cassette, brackets, screws, and installation guide so you can compare them with the parts list. Make sure no bracket is bent and no locking tab is broken. For motorized blinds, locate the remote and charging accessories, then charge the motor first if the instructions require it.
Choose an Inside, Outside, or No-Drill Mount
An inside mount sits within the window recess, while an outside mount covers the opening from the wall or trim. A no-drill mount uses compatible tension or locking hardware inside the recess instead of screws.
Before ordering, use the correct method to measure for custom zebra shades. Do not transfer measurements or bracket positions from one method to another. An inside-mount blind may be too narrow to provide the overlap needed for an outside mount.
How to Install Inside-Mount Zebra Blinds
Inside-mount zebra blinds sit within the window recess for a neat, built-in appearance. This method works only when the recess provides enough depth for the cassette and its brackets. Complete the following steps in order and use the spacing measurements supplied with your specific blind.
Step 1: Confirm the Blind Fits
Lift the cassette into the recess without attaching it. Turn the correct side toward the room, then center the unit from left to right. Make sure the cassette and hanging fabric will clear the glass, handles, locks, trim, and window sensors.
Step 2: Position the Mounting Brackets
Place each bracket where the product diagram shows it. Keep the brackets away from the motor, cassette locks, and the path of the fabric. Measure from the front edge of the recess so every bracket sits at the same depth.
Step 3: Mark the Screw Holes
Hold the first bracket firmly and mark the center of each screw hole with a pencil. Repeat for the other brackets without changing their planned spacing. Remove the brackets and use a level to confirm that the marks align before drilling.
Step 4: Drill Pilot Holes and Secure the Brackets
Choose a drill bit and fasteners that suit the mounting material. Drill a pilot hole at each pencil mark, adding suitable anchors when the surface requires them. Fasten the brackets until they are stable, but stop before the screws distort or bend them.
Step 5: Attach the Headrail or Cassette
Hold the cassette with both hands and bring it up to the brackets. Hook, rotate, or clip it into place using the sequence shown in the product guide. Check that every locking point has engaged before releasing your hands; if the cassette resists, take it down and check the bracket alignment.
Step 6: Lower and Test the Blind
Lower the blind slowly and watch both edges of the fabric. If the fabric stops or catches, release the control immediately and raise it slightly instead of pulling it or continuing to run the motor.
Check for contact with a handle, lock, trim, or sill, then confirm that the cassette is level, the fabric is centered on the roller, and every bracket is fully locked. Then align and offset the sheer and solid bands to test light and privacy control.

How to Install Outside-Mount Zebra Blinds
Outside-mount zebra blinds attach above or around the window opening. They work well with shallow recesses and can provide broader coverage around the glass.
Step 1: Center the Blind Over the Window
Measure and mark the center of the window opening. Mark the center of the cassette, then line up the two marks at your planned installation height. Check that the lowered fabric will clear handles, doors, trim, switches, and nearby furniture.
Step 2: Mark a Level Bracket Line
Use the manufacturer’s spacing diagram to identify each bracket position. Mark those positions while the blind is centered at the intended height. Place a level across the marks and adjust them into a straight line.
Step 3: Install the Brackets
Identify whether you are mounting into wood, a stud, drywall, masonry, or another material. Drill suitable pilot holes and install the correct screws or anchors for that surface. After tightening, place the level across the brackets again because a fastener can pull one side out of position.
Step 4: Mount the Cassette
Lift the cassette and support its full weight while engaging every bracket. Ask another person to hold the opposite end if the blind is wide or difficult to control. Before letting go, test the locks with gentle pressure and make sure the cassette cannot slide from side to side.
Step 5: Check Window Coverage
Lower the blind until it reaches its intended stopping point. Inspect the top, sides, and bottom to confirm that the fabric covers the planned area without touching nearby hardware.
How to Install No-Drill Zebra Blinds
A no-drill zebra blind uses tension or locking hardware instead of screws. It must be designed for this installation method and paired with a compatible window recess. Do not try to convert an ordinary bracket-mounted blind by adding adhesive or improvised pressure fittings.
Step 1: Confirm Window Compatibility
Check the product guide for the required recess width, depth, and frame condition. Inspect the contact surfaces for loose paint, damage, or raised features that could prevent an even grip. Clean the approved contact areas and let them dry completely before positioning the blind.
Step 2: Position the No-Drill Hardware
Place the tension or locking parts in the locations shown in the manual. Hold the cassette inside the recess and center it from left to right. Set a level against the cassette, correct its position, and use only the protective pads approved for that system.
Step 3: Secure and Test the Blind
Tighten, expand, or lock the mounting system in the required sequence. Keep one hand beneath the cassette while applying gentle downward pressure to test the hold. Operate the blind slowly through several cycles, then recheck the mounting pressure if the cassette moves.
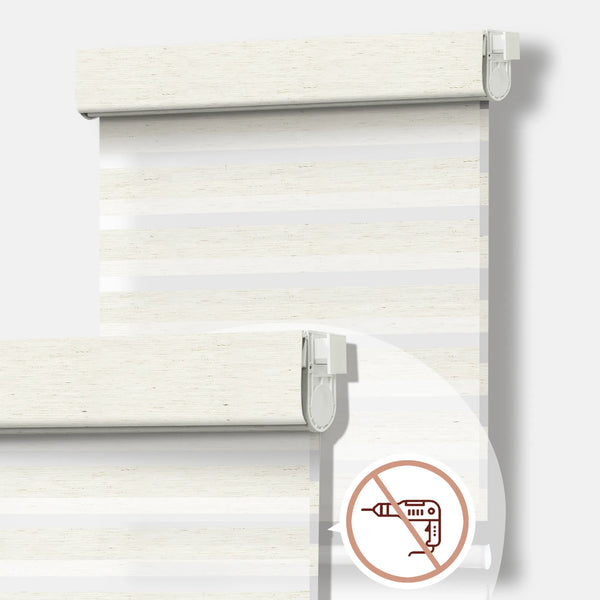
Renters often need a blind that stays secure without leaving screw holes in the window frame. The Bringnox No Drill Motorized Zebra Roller Blinds 70% Blackout Linen addresses that problem with a tool-free inside-mount system designed to grip a compatible recess. Its listed 70% blackout linen fabric softens daytime brightness while the dual-layer bands let you adjust the balance between filtered light and privacy, which is useful in living rooms or home offices that do not need total darkness.
Common Zebra Blind Installation Mistakes to Avoid
Small installation errors can affect fit, movement, coverage, or long-term stability. Some problems appear immediately, while others become noticeable only after the blind has been operated several times.
Assuming the Window Frame Is Level
Window trim can look straight even when one side is slightly higher than the other. If you copy that uneven edge, the cassette may tilt, and the fabric may roll toward one side. Mark the bracket locations first, check them with a level, and correct the line before making any holes.
Using Fasteners That Do Not Match the Surface
Identify the mounting material before choosing screws, anchors, or a drill bit. The wrong hardware can loosen under the cassette’s weight, so use fasteners rated for the identified surface and expected load.

Placing Brackets Against Moving Components
Imagine the space needed by the motor, roller, locks, and fabric before fixing the brackets. Crowding one of those areas may cause rubbing, jamming, or a cassette that cannot click into place.
Forcing the Headrail Into the Brackets
If the headrail does not engage with normal hand pressure, something is probably out of position. Pushing harder or striking the cassette can bend a bracket, damage a lock, or distort the headrail.
Lower the unit, compare the bracket direction and spacing with the diagram, and correct the alignment before trying again.
FAQs
Can zebra blinds be installed on French doors or patio doors?
Zebra blinds can fit some French doors and patio doors. Check the door’s movement, handle clearance, glass-area restrictions, and available mounting surface. A swinging door may also need manufacturer-approved hold-down hardware to control the bottom of the blind.
Can I reuse the brackets from my old roller shades?
Reuse old brackets only when the new blind’s manufacturer confirms that they are compatible. Using the hardware supplied with the new blind is the safest default.
Can one person install an extra-wide zebra blind?
Usually, no—an extra-wide zebra blind is safer and easier to install with two people. Its long cassette can be difficult for one person to hold level while marking holes or engaging several brackets. Losing control of one end may damage the blind, wall, or window trim.
Conclusion
Correct zebra blind installation starts with identifying the mount and preparing the right tools. Next, level the hardware, secure the cassette with the approved method, and test a complete operating cycle. Inside, outside, and no-drill systems require different positioning, so follow the instructions for the chosen configuration. Stop and recheck the product guide if a bracket will not hold, the cassette will not lock normally, or the fabric does not move freely.