



Can You Add a Blackout Liner for Roller Shades at Home?
Yes, you can add a blackout liner for roller shades at home when the original shade works smoothly and has room for a thicker fabric roll. The control system must also support the added weight. This project works best when light passes through otherwise sound fabric. A damaged mechanism or crowded cassette usually makes replacement a more reliable choice.
Will a Blackout Liner for Roller Shades Work?
Most roller shades are designed around the weight and thickness of their original fabric. A liner changes both. Check where the light enters and how well the shade operates before choosing this retrofit.
A Liner Works When Light Passes Through Sound Fabric
A liner is suitable when the fabric causes the light problem, and the roller remains in good condition. Lower the shade during direct daylight. A general glow or small bright points across the center show that light is passing through the material.
For a motorized shade, ask the manufacturer to confirm the supported weight and roll diameter. Do not rely on the fact that the motor can lift the original fabric.
|
Suitable condition |
Why a liner can work |
|
Light glows through the fabric |
An opaque layer can stop light |
|
Roller moves smoothly |
The control may accept limited extra weight |
|
Fabric rises evenly |
There is no clear tracking fault |
|
Tube remains straight |
The shade has a stable base for the liner |
|
Open roller has spare space |
The thicker roll can turn freely |
|
Motor load is approved |
The motor can lift the finished panel |
A Liner Does Not Work With Weak or Crowded Shades
A liner is unsuitable when the existing mechanism has problems, or the incoming light comes from outside the fabric area.
A shade that drops after release is already exceeding the reliable holding power of its control. A bowed tube or sideways movement also points to a mechanical problem that should be corrected first.
The Bringnox Motorized Roller Shades 100% Blackout Linen offers an alternative when the old mechanism is unsuitable. Its 100 percent blackout material is paired with custom sizing and cordless motorized control. The finished single panel does not depend on an old spring or clutch to lift two bonded fabrics.

|
Unsuitable condition |
Why a liner will not solve it |
|
Spring or clutch slips |
Added weight can make the shade drop |
|
Fabric moves toward one side |
Another layer can increase poor tracking |
|
Roller tube is bowed |
Extra weight can increase the curve |
|
Cassette is crowded |
The thicker roll may hit the enclosure |
|
Light enters beside the panel |
A liner cannot cover mounting clearance |
|
Backing is peeling |
Adhesive may cause more damage |
|
Motor capacity is unknown |
The extra load may strain the motor |
How Do You Add a Blackout Liner for Roller Shades?
The liner must remain square with the original panel. Prepare the materials first and follow the bonding product’s instructions throughout the project.
|
Material or tool |
Purpose |
|
Flexible blackout liner |
Stops light through the panel |
|
Compatible textile adhesive |
Holds both fabrics together |
|
Measuring tape |
Records the panel size |
|
Metal ruler |
Guides straight marks |
|
Fabric cutter |
Produces clean edges |
|
Removable tape |
Holds the dry fit |
|
Lint-free cloth |
Removes surface dust |
Step 1: Prepare the Shade and Workspace
Clear a flat surface large enough for the fully extended shade. Remove dust and anything that could mark the front fabric.
Place the shade face down. Unroll it slowly without pulling the mechanism beyond its normal lower limit. Keep small parts together so they can be returned to the correct bracket.
Step 2: Select and Test the Liner
Choose a thin liner that remains flexible when rolled. Hold a sample against direct daylight. It should show no general glow or open weave. True blackout material should have 0 percent openness.
Wrap the sample around a tube close to the size of the existing roller. Reject it if the coating cracks or the edges remain curled after unrolling.
Bond two leftover pieces with the adhesive. Allow the sample to cure for the full period. Roll it tightly and check for lifting or stiffness. Avoid heat unless both fabric manufacturers approve it. An iron can damage vinyl or coated blackout material.
Step 3: Measure the Existing Panel
Measure the original fabric near the top and bottom. Record both widths so you can identify any difference between the two edges.
Measure the section that covers the window when the shade is lowered. The liner can begin slightly above the top of the visible opening instead of wrapping around the complete tube.
Keep the liner within the original side edges. Extra width can rub against the brackets and affect tracking.
Step 4: Cut and Dry Fit the Liner
Lay the liner flat without stretching it. Use a metal ruler to guide each long cut.
Cut with steady strokes so the edges remain smooth. Rough edges can fray or create uneven thickness on the roll.
Place the finished liner on the back of the shade. Align its top with the marked reference line and hold it with removable tape.
Check the distance between the liner and each fabric edge. Roll a short section by hand. Reposition the liner if either side begins moving outward.
Step 5: Attach the Liner
Remove the temporary liner and wipe the back of the shade with a dry, lint-free cloth. Return the liner to the reference marks. Bond one short section across the top and check the side alignment again.
Continue downward in small areas. Smooth each section from the center toward the nearest edge to remove trapped air. Do not stretch either fabric while bonding. Unequal tension can cause curling after the shade is raised.
Step 6: Allow the Bond to Cure
Leave the shade flat for the complete curing period listed on the adhesive package. Do not roll the fabric as soon as the surface feels dry.
Inspect the top and side edges after curing. The liner should remain flat when you lift a small section of the panel. Roll a small portion by hand. Stop if a bonded area forms a hard ridge or pulls the original fabric sideways.
Step 7: Reinstall and Test the Shade
Return the roller to its original brackets and confirm that both ends are locked. Keep the shade partly lowered for the first test. Raise it slowly while watching both edges. Stop and unroll the shade if the panel begins moving toward one bracket.
Complete several full cycles. A manual control should hold the liner at different heights. A motor should keep its normal speed and sound.

When Is a Separate Blackout Layer Better?
A bonded liner turns the original fabric into one opaque panel. Purpose-built blackout roller shades work well when consistent darkness is the main goal.
Rooms that need different light levels benefit from double blinds. Their filtering and blackout fabrics move independently, allowing the window to serve different uses during the day.
A Home Office Needs Daylight and Guest Room Darkness
A home office benefits from daylight while the desk is in use. A light filtering layer can soften direct sunlight and reduce screen glare without making the room too dark.
The same room may become a guest bedroom at night. Lowering the separate blackout layer provides stronger privacy and prevents outdoor light from reaching the sleeping area.
A Nursery Needs Soft Daylight and Nap Time Darkness
A nursery can use filtered light during normal daytime activity. The blackout layer can then be lowered for naps without removing the daylight option.
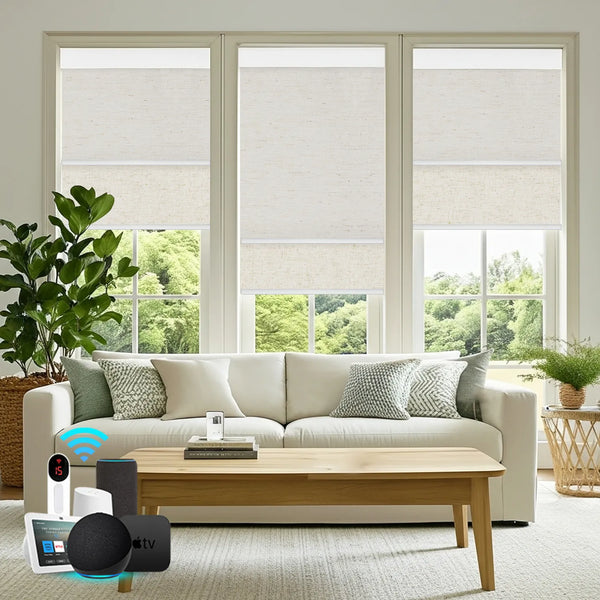
The Bringnox Motorized Dual Shades combines a light-filtering fabric and a blackout fabric within one valance. Each layer can be adjusted by remote, app, or voice control, so the window can move from filtered daylight to naptime darkness without handling the fabric.
The motorized system also avoids a hanging operating cord. This makes daily adjustment more convenient around cribs, changing areas, and other nursery furniture.
FAQ
Does a blackout liner need to be black?
No. Opacity comes from the material’s construction. A light colored liner can block light when it contains a completely opaque layer.
Can you line a motorized roller shade?
Sometimes. Ask the manufacturer to confirm motor capacity and roll clearance. Stop using the shade if the motor slows or loses its limits.
Will adding a liner void the warranty?
It may. Permanent adhesive and added weight can count as unauthorized changes. Read the warranty before modifying the fabric.
Can a liner be sewn to the shade?
Only when both fabrics allow stitching. Needle holes may damage a coated surface, while thick seams can affect rolling.
Does a liner improve insulation?
It may reduce direct solar exposure. Exact thermal performance depends on the full window assembly, so a DIY liner should not be given a fixed energy-saving percentage.
Should You Add a Blackout Liner for Roller Shades?
Add a blackout liner when light passes through the fabric and the mechanism can support the added material. Test the liner and adhesive before modifying the full panel.
Choose a replacement shade when the roller is weak or crowded. Use separate filtering and blackout layers when the room needs flexible light control.