



Best Way to Clean Mini Blinds: Dust, Grime, and Deep Cleaning
The best way to clean mini blinds is to remove loose dust first, then use a barely damp microfiber cloth on washable slats. This method works well for homeowners cleaning common aluminum or vinyl mini blinds without removing them from the window.
Sticky grime needs mild dish soap, while heavy buildup may require manufacturer-approved washing. Check the blind material and care label before using water because some headrails and operating parts must stay dry.
How Should You Clean Mini Blinds Based on the Type of Dirt?
Mini blinds do not need the same level of cleaning every time. Match the method to the visible buildup and begin with the least aggressive option.
Choose a Cleaning Method Based on the Type of Dirt
|
Type of dirt |
Recommended method |
Important precaution |
|
Loose household dust |
Use a dry microfiber cloth or a vacuum with a soft brush |
Support thin aluminum slats while wiping |
|
Fingerprints and light marks |
Wipe with a barely damp microfiber cloth |
Test a hidden area first |
|
Sticky kitchen grime |
Use lukewarm water with mild dish soap |
Remove loose dust before adding water |
|
Heavy washable buildup |
Remove and wash the blind if the manufacturer permits it |
Keep restricted headrails and controls dry |
|
Permanent discoloration |
Check for material aging after gentle cleaning |
Stronger chemicals cannot reverse sun damage |
These methods mainly apply to aluminum and vinyl mini blinds. Fabric roller shades usually require gentle vacuuming or limited spot cleaning because excess water may affect the fabric or its coating.
Cleaning Tools and Their Uses
Avoid abrasive pads because they can scratch painted metal. Apply any approved cleaner to the cloth instead of spraying it directly onto the blind.
|
Cleaning tool |
Purpose |
|
Microfiber cloth |
Captures dust and wipes individual slats without scratching |
|
Vacuum with a soft brush |
Removes loose dust from several slats more quickly |
|
Mild liquid dish soap |
Loosens fingerprints and greasy residue on washable surfaces |
|
Small bowl |
Holds a controlled amount of cleaning solution |
|
Dry towel |
Protects the sill and absorbs moisture after wiping |
|
Cotton swab |
Cleans narrow areas around ladder cords and slat openings |
How Do You Clean Dust and Grime From Mini Blinds
Most dusty or greasy mini blinds can be cleaned while they remain installed. This protects the mounting brackets from unnecessary handling and avoids carrying a flexible blind through the house.
Step 1: Lower and Inspect the Mini Blinds
Lower the blind to its full length before cleaning. Look for cracked vinyl, bent aluminum, loose brackets, or damaged cords.
Operate the tilt mechanism once to confirm that the slats move freely. Stop if the blind sticks or makes an unusual sound because cleaning will not repair a damaged headrail.
Step 2: Tilt the Slats Almost Closed
Turn the slats downward until they overlap slightly. Leave a narrow opening between them so the cloth can reach the covered edges. Do not push the slats flat against the window. Holding the bottom rail with one hand can reduce movement while you clean.
Step 3: Remove Loose Dust From the Top Down
Wipe each slat from one end to the other with a dry microfiber cloth. Support a thin slat from behind when the cloth meets resistance.
A vacuum can shorten the process when the whole blind has an even layer of dust. Use a clean, soft brush and low suction so the nozzle does not pull the slats out of position.
Step 4: Prepare a Mild Cleaning Solution
Add a small amount of mild liquid dish soap to lukewarm water. Strong concentrations take longer to remove and may leave visible residue. Dip a clean microfiber cloth into the solution, then wring it until no water drips. Test the solution on a hidden section near the top or side of the blind. Allow the test spot to dry before cleaning the visible slats.
Step 5: Wipe Grime From One Slat at a Time
Hold the back of the slat and wipe from the center toward one end. Clean the remaining half with the same light pressure. Rinse the cloth when it becomes gray or greasy. Continuing with a dirty cloth transfers residue to the next slat. Give stubborn marks a second gentle pass.
Dry each cleaned area if water collects near a cord opening. Stop immediately if the surface color transfers to the cloth.
Step 6: Turn the Slats and Repeat
Tilt the blind in the opposite direction after the first side is clean. Repeat the dry or damp method according to the condition of the rear surface. The window-facing side may contain more dust near an open window. Kitchen blinds may have heavier buildup on the side exposed to cooking air.
Check both edges of every slat. Grime often remains along the narrow lip even when the broad surface looks clean.
Step 7: Clean the Headrail and Window Sill
Use a dry cloth around the headrail and mounting brackets. Do not spray cleaner into the tilt mechanism or cord openings. Clean accessible ladder cords with a dry cotton swab. Pulling or twisting them can affect how the slats hang.
Vacuum the sill and floor after finishing. Removing fallen dust prevents it from returning to the newly cleaned blind.
Leave the blind lowered until every damp area is dry. Operating or stacking wet slats can leave marks where the surfaces touch.

How Do You Deep Clean Mini Blinds?
Deep cleaning is suitable for washable aluminum or vinyl mini blinds that remain dirty after careful wiping. Manufacturer instructions take priority over general household advice. Some blinds permit limited water immersion, while powered systems and certain headrails must remain dry.
Step 1: Confirm That Removal and Washing Are Allowed
Find the manufacturer label inside or behind the headrail. Search the model name for its current care instructions if the original document is unavailable.
Take a photo of the brackets before releasing the blind. The image will help you return clips and locking tabs to their correct positions.
A mini blind should not enter the bathtub when its instructions prohibit immersion. If the window covering is actually a roller shade, follow a separate method for cleaning roller shades.
Step 2: Remove the Blind Without Bending the Slats
Raise the blind completely so the slats are stacked before releasing the brackets. Do not pull the blind forward until every retaining clip is open. A closed clip can bend the headrail or damage the mounting surface.
Support both ends of the headrail as it comes away from the window. Carry the blind horizontally with support under the middle. Long mini blinds can flex under their own weight.
Step 3: Wash Only the Approved Parts
Protect the bathtub with a clean towel or rubber mat. Add mild detergent according to the product instructions. Skip vinegar, bleach, ammonia, and abrasive powder unless the manufacturer approves them for the exact finish.
Use lukewarm water because high heat may warp vinyl. Gently move water across the slats instead of scrubbing them with a stiff brush.
Step 4: Rinse the Mini Blinds Thoroughly
Drain the dirty water and rinse the approved washable parts with clean water. Check the edges and cord openings for remaining soap. Do not twist the blind to remove water. Blot accessible surfaces with a clean towel instead.
Step 5: Dry and Reinstall the Mini Blinds
Lay the blind flat on clean towels or hang it in a protected area where water can drain. Keep the slats lowered and separated during drying. Reinstall the blind only when every washed part is dry.
Test the tilt control before raising it completely. If the blind no longer moves evenly, lower it and check the brackets. Forcing a damaged mechanism can make the problem worse.
When Should Mini Blinds Be Replaced Instead of Cleaned?
Cleaning can remove surface dust and washable residue. It cannot reverse physical damage, restore a failed operating system, or renew a finish that has permanently changed. Replacement is the practical choice when the blind no longer provides reliable light control or safe operation.
Permanent Yellowing Will Remain After Cleaning
Grease or smoke residue may improve after gentle washing. Yellowing caused by long-term sunlight exposure can remain because the material itself has changed.
Compare a hidden area with the exposed surface after the blind dries. A lasting color difference indicates material aging rather than removable dirt.
Rooms that need strong light control can replace the damaged blind with blackout roller shades. A new opaque panel restores coverage that cleaning cannot recover.
Cracked Finishes and Peeling Surfaces Require Replacement
Cleaning cannot repair a finish that flakes onto the sill or separates from the slat. Continued wiping may remove more of the damaged coating.
Replace vinyl that has become brittle enough to crack during normal tilting. Sharp metal edges also make the blind unsuitable for continued use.
Bent or Warped Slats Cannot Be Restored by Cleaning
A deeply creased aluminum slat will continue to leave a light gap after washing. Heat-warped vinyl may also prevent neighboring slats from closing evenly.
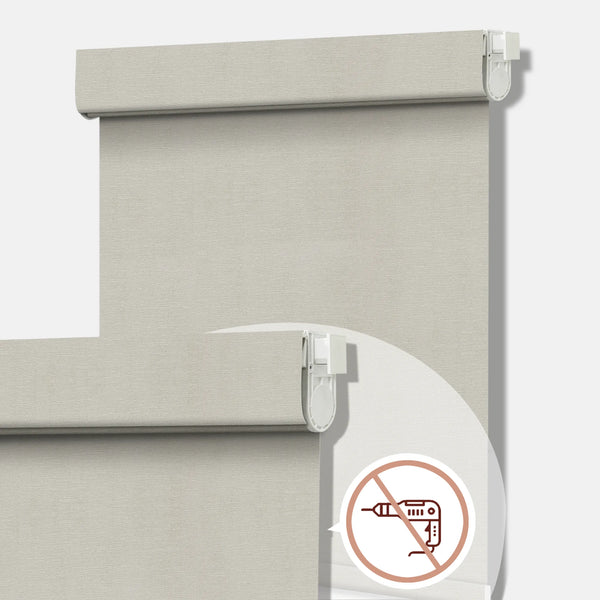
Several damaged slats usually make full replacement more practical than individual repair. The Bringnox No Drill Motorized Roller Shades 100% Blackout Bermuda replaces uneven slats with a manufacturer-rated 100% blackout panel. The flat surface reduces slat-by-slat cleaning, while the blackout material solves the light gaps left by bent mini blinds.
Broken Cords and Failing Headrails Need Replacement
Cleaning cannot repair a cord that is frayed or a headrail that no longer tilts the slats. A blind that drops unexpectedly should be taken out of use.
Current CPSC guidance says stock window coverings must have a cordless system, an inaccessible operating cord, or a cord no longer than eight inches. Accessible cords are especially important to address in homes with young children.
The Bringnox Motorized Light Filtering Roller Shades 70% Blackout Bouvardia provides cordless motorized operation when a room still needs filtered daylight. It supports damp-cloth cleaning and about four to six months of battery use per charge.

FAQs
Can dryer sheets keep mini blinds dust-free?
Not reliably. New dryer sheets may leave softener residue on the finish. A clean microfiber cloth gives more predictable results.
Can you steam-clean mini blinds?
Usually no. Heat may warp vinyl, while moisture can enter the headrail. Use steam only when the manufacturer expressly approves it.
Why do mini blinds look streaky after cleaning?
Soap or dirty water may remain. Wipe the slats again with a clean, barely damp cloth, then dry them before closing the blind.
Can moldy mini blinds be cleaned?
Sometimes. Small surface spots on washable material may respond to manufacturer-approved cleaning. Replace the blind when contamination has entered an inaccessible headrail or damaged the finish.
How often should mini blinds be cleaned?
Clean them when visible dust appears. Kitchens and open windows may require more frequent attention, while low-dust rooms can go longer between cleanings.
Keep Mini Blind Cleaning Simple
Choose the method according to the dirt. Remove dust while the blind is hanging, add mild soap for washable grime, and use bathtub cleaning only when the manufacturer permits it.
Cleaning has clear limits. Bent slats, permanent discoloration, damaged finishes, and unsafe operating parts require repair or replacement rather than stronger chemicals.