



Best Way to Clean Blinds Without Taking Them Down
The best way to clean blinds without taking them down is to remove loose dust first, then use the least moisture the material can safely handle. A microfiber cloth and a vacuum brush handle most routine soil. This method suits homeowners and renters who want a thorough clean without removing the headrail.
How to Clean Different Types of Blinds
The blind material determines the safe cleaning method. Wood needs a mostly dry process, while vinyl usually accepts a damp wipe.
Match Each Blind Material to the Right Method
This table gives a safe starting point. Product instructions take priority because finishes vary within each category. Current manufacturer guidance supports soft dusting and product-specific spot cleaning.
|
Blind material |
First cleaning method |
Moisture limit |
Main risk |
|
Real wood |
Dry microfiber cloth or soft vacuum brush |
Very low |
Warping or finish damage |
|
Faux wood or vinyl |
Dry dusting followed by a damp wipe |
Moderate |
Soap residue at slat edges |
|
Aluminum |
Dry cloth followed by a light damp wipe |
Low |
Bending thin slats |
|
Fabric or cellular |
Low suction through a clean brush |
Only where care instructions allow |
Water rings or crushed pleats |
|
Roller fabric |
Gentle vacuuming and approved spot cleaning |
Low |
Staining or loss of shape |
|
Motorized shades |
Method approved for the visible material |
Keep powered parts dry |
Damage to motors or controls |
Prepare the Blind and Cleaning Tools
Place a towel below the window and clear the sill. Lower the blind without forcing its controls. Use two microfiber cloths, a vacuum with a clean brush, and mild dishwashing liquid only when the material permits damp cleaning.
Use one cloth for soil and keep the other dry. Rinse the first cloth when it becomes gray or oily.
How to Clean Blinds Without Taking Them Down
The same order works for hard slats, roller shades, and layered double blinds. Finish the dry pass before treating grease so loose dust does not become a paste.
Step 1: Lower and Position the Blind
Lower horizontal blinds fully and tilt the slats downward until they overlap slightly. Do not force them tightly closed because this can hide an edge and strain the tilt mechanism.
Extend roller or cellular shades until the panel lies flat. Turn vertical vanes to one side and support each vane near the bottom while cleaning.
Step 2: Remove Loose Dust From the Top Down
Use low suction and move the soft brush with the slats or pleats. Hold the flexible material steady. A dry microfiber cloth can replace the vacuum on smooth slats.
Work downward so falling dust lands on an uncleaned area. Reverse horizontal slats after the first pass. Wipe vertical vanes downward to avoid lifting them from their hooks.
Step 3: Clean Hard Slats and Kitchen Grease
Mix lukewarm water with a few drops of mild dishwashing liquid. Wring the cloth until it stops dripping and test a hidden spot for color or sheen changes. Wipe suitable faux wood, vinyl, or metal with light pressure. Keep real wood dry unless its instructions permit a wood cleaner.
Old kitchen film may need an approved degreaser. Test it first and stop if the finish becomes dull. Rinse the cloth often so grease does not move to the next slat.
Step 4: Vacuum Fabric and Roller Shades
Keep the fabric fully extended and use low suction with a clean brush. Follow the direction of the weave or pleats. Blot the approved solution with a white cloth, then lift residue with a barely damp cloth. Let the fabric dry before repeating. Controlled spot cleaning is safer than soaking for many coated fabrics.
Step 5: Clean Zebra and Dual Shade Layers Separately
Open zebra bands to expose each hidden strip. Vacuum without pressing the mesh into the opaque band. The Bringnox Motorized Dual Shades provide independently controlled light-filtering and blackout layers. Remote or app control lowers each panel flat, allowing separate cleaning without twisting the fabric. Keep the shared valance dry.

Step 6: Dry the Blind and Test Its Movement
Dry every damp area. Leave fabric shades extended and hard slats open. Rolling damp fabric can transfer marks between layers.
Operate the blind through one slow cycle after it is dry. Stop when the blind tracks unevenly, a slat catches, or a motor makes an unfamiliar sound.
How to Clean Motorized Blinds Without Taking Them Down
Moisture can damage the roller tube, battery compartment, or control module. Before cleaning motorized blinds, check which parts must remain dry.
Step 1: Disable the Controls and Lower the Shade
Lower the shade fully and disable automatic schedules. Follow the manufacturer's instructions on whether the motor should be switched off or disconnected, then move the remote away.
Step 2: Remove Loose Dust From the Fabric
Use low suction with a clean brush and work downward. A dry microfiber cloth suits smooth roller fabric. Avoid pressing near the edges because uneven pressure can affect how the material rolls.
Step 3: Spot Clean Approved Fabric
Check the care instructions before using water. Test the approved solution on a hidden area, then blot the mark. Remove soap residue with a second barely damp cloth below the roller tube.
Step 4: Remove Grease From Washable Motorized Shades
Kitchen shades can develop a sticky film that holds dust. Wipe the panel with mild soapy water on a cloth. Dry it immediately without soaking the blackout backing or edges.
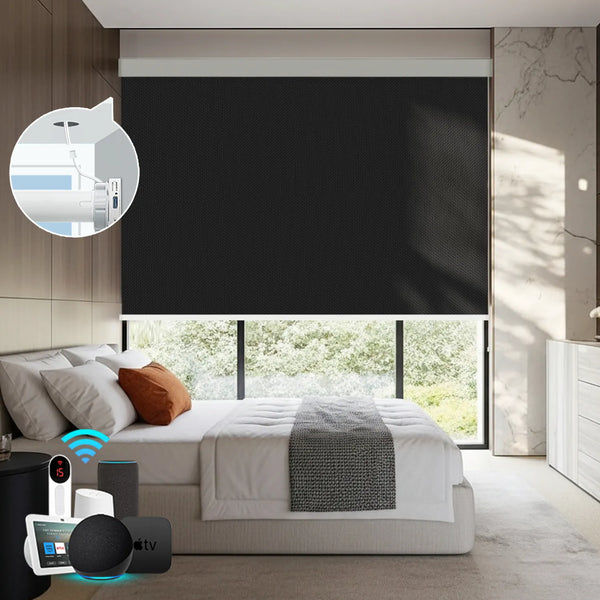
The Bringnox Motorized Roller Shades 100% Blackout Vinyl use a wipeable vinyl face with cord-free remote or app operation. The surface supports light damp cleaning, while powered control reduces fingerprints caused by frequent handling.
Step 5: Clean the Headrail and Powered Parts
Dry-wipe the headrail and brackets. Keep water away from powered connections. If debris enters the roller or motor housing, follow the service instructions instead of inserting a brush.
Step 6: Let the Shade Dry and Test Its Movement
Leave the shade extended until dry. Restore power and run one slow cycle. Stop if the fabric tracks unevenly, the bottom rail catches, or the motor sounds unfamiliar.
When Should You Replace Blinds Instead of Cleaning Them
Cleaning cannot repair damaged material or a failing mechanism. Consider replacement when an approved method produces no improvement or continued use creates a safety concern.
Replace Blinds With Warped or Broken Materials
Cracked slats and warped wood cannot return to their original shape through cleaning. Replacement is also appropriate when a roller fabric curls at the edges or separates from its backing.
A few slats may justify repair. Widespread distortion prevents even closure and leaves permanent light gaps.
Replace Blinds When Stains or Odors Remain
Set-in grease, smoke residue, or water stains can move below the visible surface of porous fabric. Stop cleaning when repeated approved treatments produce no change or begin to alter the color.
Replace porous blinds when mold returns, reaches seams, or grows inside a cellular pocket. Persistent odor after drying also indicates deeper contamination.
Replace Blinds With a Failing Mechanism
A blind should raise evenly and hold its selected position. Repeated stalling, slipping, or crooked travel usually points to a worn lift system rather than dirt.
Motorized shades may need service when they lose their limits or make grinding sounds. Replace the unit when the manufacturer cannot supply a safe repair or compatible part.
Replace Blinds With Unsafe Operating Cords
Pause if an older blind has a free-hanging, frayed, or damaged cord. The ANSI and WCMA A100.1-2022 standard took effect for products manufactured from June 1, 2024, and greatly expanded cordless or inaccessible-cord requirements in the United States.
This standard concerns cord safety rather than cleaning. Homes where young children live or visit should replace hazardous corded coverings instead of attempting an improvised cord repair.

FAQs
How Often Should You Clean Blinds That Stay Up
Every two to four weeks is a practical starting point. Homes with pets, open windows, or kitchen grease may need weekly checks. Adjust the interval when one cloth pass collects visible dust.
Can I Use Vinegar to Clean Blinds
Only when the care instructions allow it. Vinegar can affect finishes and coated fabrics. Mild dish soap is a safer starting point for washable vinyl or metal.
Can I Steam Clean Hanging Blinds
Usually no. Heat and moisture can distort fabric or reach powered parts. Use steam only when the manufacturer names the exact material as compatible.
Can Fresh Dryer Sheets Clean Blinds
They are not the best choice. Fresh sheets may leave fabric softener on slats. Clean microfiber captures dust without adding residue.
Is There an Official Blind Cleaning Standard
No universal household cleaning standard exists. Follow the product care label and warranty instructions. ANSI and WCMA A100.1-2022 covers operating-cord safety rather than cleaning.
The Best Way to Clean Blinds Without Taking Them Down
Start dry, work from the top, and add moisture only after confirming the material can accept it. This sequence removes most household dust and light grime while the blind remains securely installed.
Keep moisture away from sensitive materials and powered parts. Replace blinds when damage, contamination, or mechanical failure remains after the correct cleaning method.