How to Install Blackout Roller Shades: An Easy Guide
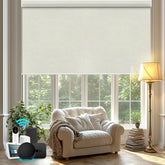
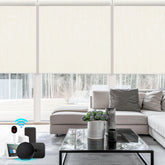
A smart selection makes blackout roller shades attractive to homeowners who would prefer a dark and quiet environment. They would be ideally suited to bedrooms, living rooms, nurseries, or home theaters where maximum privacy and light control are required.
This step-by-step tutorial will enable you to know how to install blackout roller shades with ease. All this is told in easy, simple steps so you can make your home more comfortable and stylish.
Why Choose Blackout Roller Shades?

Blackout roller shades are an easy option that can help you make your house more comfortable and convenient.
They are in more styles and colors, and fabrics than ever before, which means that you can match them with your decor at home. These shades are not only meant to prevent light penetration but also to conserve energy and give your windows a classy appearance.
Benefits of Blackout Roller Shades
Blackout roller shades have lots of advantages that people living in a home adore:
- Better Sleep: These shades block out all the light, thus leaving your room dark to have a deeper and more restful sleep.
- Energy Saving: They cool your room during summer and heat it up during winter, saving on energy bills.
- Modern Style: There are always a lot of different patterns and colors, and it is easy to find a match for your home design.
- Simple Cleaning: It is easy to maintain and only needs either a cloth or a light vacuum cleaning.
- Added Privacy: They can be installed in windows facing the street or areas that require absolute privacy.
Materials and Tools You Will Need
It will also be easy to get your tools prepared in advance. Here's what you should have:
- A tape measure to measure the size of the window.
- Marking pencil to indicate a bracket position.
- Screw drill bits with proper drills.
- Screwdriver to fasten brackets.
- Screws and wall anchors (helpful when mounting on drywall).
- Slice to ensure that your shade is straight.
- Brackets (typically supplied with shade).
- Your blackout roller shades of choice.
How to Install Blackout Roller Shades Step-By-Step
Step 1: Measure Your Windows Properly

Read more about how to measure your windows.
Inside Mount
Measure the width of the top and bottom, and middle of the window frame. The shade should fit, hence using the smallest number. Next, measure the distance between the top and the sill.
Outside Mount
The width of the window frame is measured, and 2-3 inches are added to each side. Measure the height, and also a few inches above and below the frame, to keep out light completely.
Careful measuring helps avoid leaks of light and makes your shades look like they were professionally installed.
Step 2: Select Inside / Outside mount
Select a mounting type according to your requirements.
- The inside mounts give the appearance of a smooth built-in appearance, but it is necessary to have a deep window frame.
- Outside mounts wrap the entire frame, screen out more light, and are the best choice when you have shallow, nonuniform, or trimmed windows that you do not want showing.
Consider the functionality of the room - bedrooms normally come with outside mounts to enhance performance in the event of a blackout.
Step 3: Tick the Bracket Positions
Draw the locations of each bracket with a pencil. Make a mark on the screw holes and position the brackets against the wall or window frame.
Always work with a level in ensuring that each side is perfectly even, since the slightest variation would cause your shade to roll up unevenly.
When the shades are to be installed in multiple shades, be sure to mark each window separately to give your work an attractive, professional appearance.
Step 4: Installing the Mounting Brackets
Create small pilot holes in the spots that you marked. This does not lead to the splitting of wood and makes the insertion of screws easier. When drilling into plaster or drywall, wall anchors are an added strength.
Drill the brackets with screws, but be careful not to tighten them too tightly. A durable bracket installation will create a roller shade that will be less likely to fall down.
Step 5: Secure the Blackout Roller Shade
Gently put the roller shade into the brackets. Insert until there is a click or it clips into position. Before releasing, be sure that the two ends are completely seated. Draw the shade down and roll it up a few times to make sure the shade moves smoothly and evenly.
Step 6: Modify the Tension (When necessary)
Should your blackout roller shade roll too fast or fail to hang down, then you will have to re-adjust the spring tension. Take the shade off the brackets and twist the spring end in little bits.
Install it again and test until it can move at the optimal speed. Over-twisting should be avoided as this can break the spring.
Step 7: Test and Finalize
Pull the shade all the way down and roll it up a few times to test the performance. Find places of light on the sides and realign the brackets.
Screws that are loose should be tightened, pencil marks should be removed, and the area should be cleaned up so as to give it a polished appearance.
Take a step back and make sure that the shade looks straight and that it works well.
Tips for Installing Blackout Roller Shades
- Measure Three Times: Triple-check all your measurements, so that you do not buy shades that do not fit.
- Check Window Depth: When constructing inside, make sure that your window frame is deep enough to fit the brackets.
- Utilize Quality Tools: A quality drill and level will save time and assist in attaining a professional finish.
- Work Slowly: Brackets may be crooked due to rushing, or screws may be stripped.
- Get Help with Large Windows: Large shades are awkward and hard to use single-handedly.
- Consider Child Safety: Select cordless blackout roller shades in a house with children or pets.
Common Mistakes When Learning How to Install Blackout Roller Shades
| Common Mistakes | Reasons |
| Measuring improperly | This is the worst and most common error that causes improper fits and light gaps. |
| Leaving out the level | Inequity in brackets causes shades to lean and appear dishevelled. |
| Failing to use anchors on drywall | This will bring loose brackets in the long run. |
| Forgetting to check before completion | It is by no means putting the shade down and rolling it up, then thinking the job is complete. |
| Installing too close to the window trim | This may help prevent the shade from rolling easily. |
Maintaining Your Blackout Roller Shades

To extend the life of your shades, it will be helpful to keep them clean and in good condition:
- Weekly Dusting: Dust away any dust on the surface with a microfiber cloth or duster.
- Vacuum Monthly: A vacuum that has a soft brush head is an excellent cleaner.
- Spot Cleaning: If there is a small spot, then apply mild soap and a damp cloth. Blot very subtly and do not wet the cloth.
- Keep dry: Take care not to excessively use water because it may ruin the roller mechanism or cloth.
- Check Brackets and Screws: Check brackets and screws every few months to ensure that they are firm.
You can read How to Clean Roller Shades to know more about it.
Troubleshooting After You Install Blackout Roller Shades
1. Shade Rolls Up Too Fast: To take the tension off, slightly loosen the spring.
2. Shade Does Not Stay Down: Put on more tension until it stays where it is.
3. Uneven Roll: Check the shade and ensure that it is level.
4. Light Leaks on Sides: Add side channels or install a shade a bit bigger to seal leaks.
5. Shade Feels Stiff: Clean as necessary and check dust in the mechanism.
Finally: How to Install Blackout Roller Shades for a Perfect Finish

You can easily learn how to install blackout roller shades when you have the correct procedures and equipment. With proper measurements, bracket installation, and minor adjustments, homeowners can gain the full benefit of controlling the light and improve their privacy.
Blackout roller shades are a clever and elegant addition to any room to facilitate a relaxing ambience and save energy. Get them installed now and have a more comfortable and cozy home.
FAQ
Can I install blackout roller shades myself?
Yes! This is a homeowner's guide to install them themselves.
Will they work with all window sizes?
Yes, they can be made to fit nearly any size of window.
Can blackout roller shades help save energy?
Yes, they can conserve room temperature and save energy.


